“The Cloud” is a term that we use to describe a way of hosting and running websites and applications where we ship off our files and databases to whomever we choose and have all the worries of managing the details of hardware, operating systems, networks and datacentres managed for us by them. This way, the specialists at the cloud provider can focus on providing a high quality, scalable platform, and the customer can focus on developing and deploying their website or application.
There are many cloud providers and today we will look at the recently-refreshed Windows Azure from Microsoft.
Windows Azure
Azure is Microsoft’s cloud platform and runs on their datacentres all around the world. As a Microsoft product many web developers might shy away from Azure as an option with concerns it might not support non-Microsoft technologies or frameworks such as PHP, Node.js, Python, or Java – actually Azure supports all these and more; any operating system and any language.
>
You can learn all about what Windows Azure offers on their “What is Windows Azure?” page, so I won’t go into detail here. Instead, we’ll look at a specific example, getting a WordPress website (build in PHP and usually run on Apache with MySQL) up and running on Windows Azure.
The first step is to set up an account on Azure, you’ll need a phone number and a credit/debit card (which will not be charged) to validate your account. They currently have a 3-month free trial, after that their prices seem very reasonable and like most cloud providers you only pay for what you use.
WordPress on Azure
Once you’re logged in, click on the “Manage” option in the navigation at the top of the screen and you’ll be taken to the page shown below.
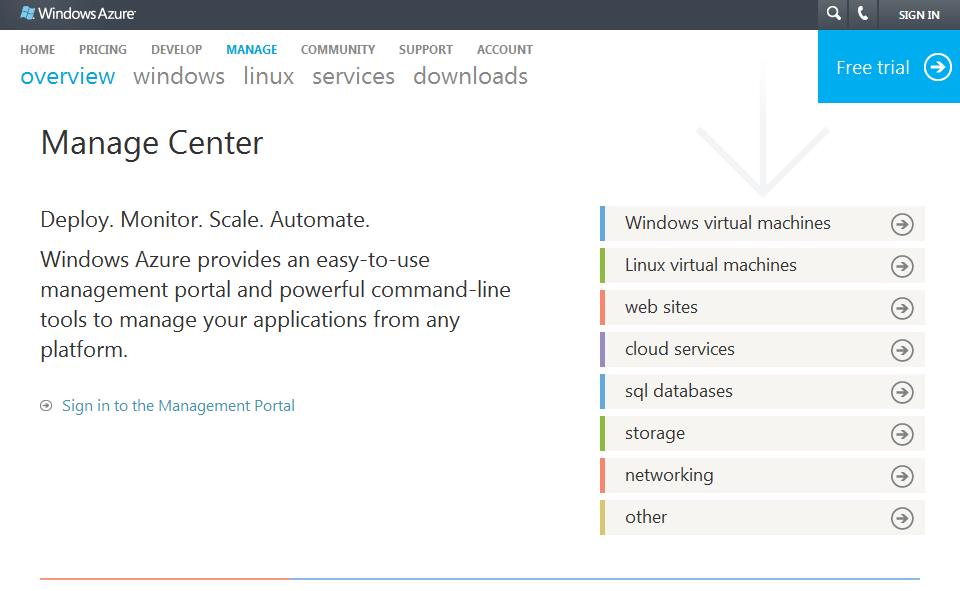
From here, click on the “Sign in to the Management Portal” link on the left and you’ll be taken to the shiny, new Azure management app.
The first time you access it you’ll get a little tour, but eventually you’ll get to your dashboard, which will be empty and look something like this:
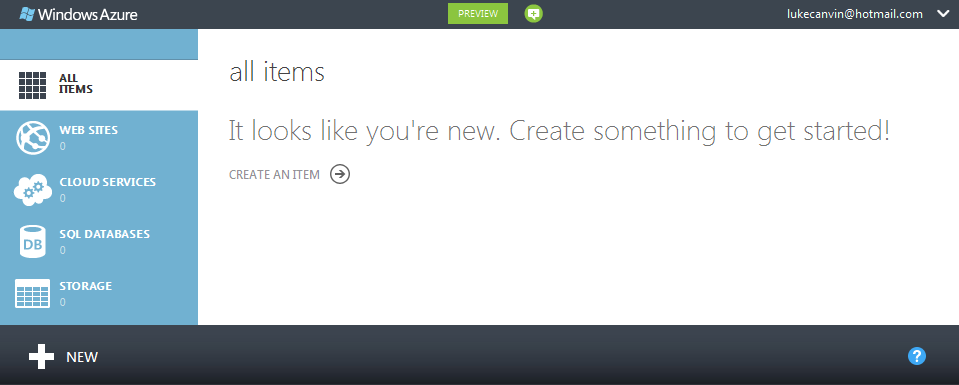
Just a side note: When I registered there was a short wait before the “web sites” option (which we will be using below) was available to me; just a couple of hours.
Choose the “web sites” option on the left and click “create a web site”.
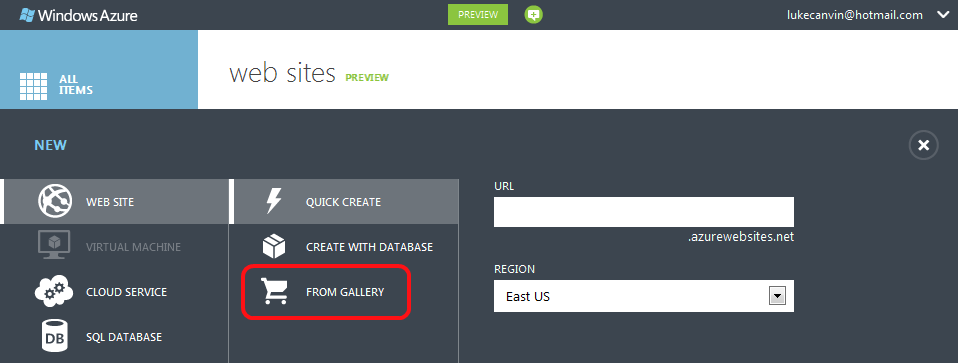
Choose the “from gallery” option, highlighted above, and then find the WordPress option in the list of apps available.
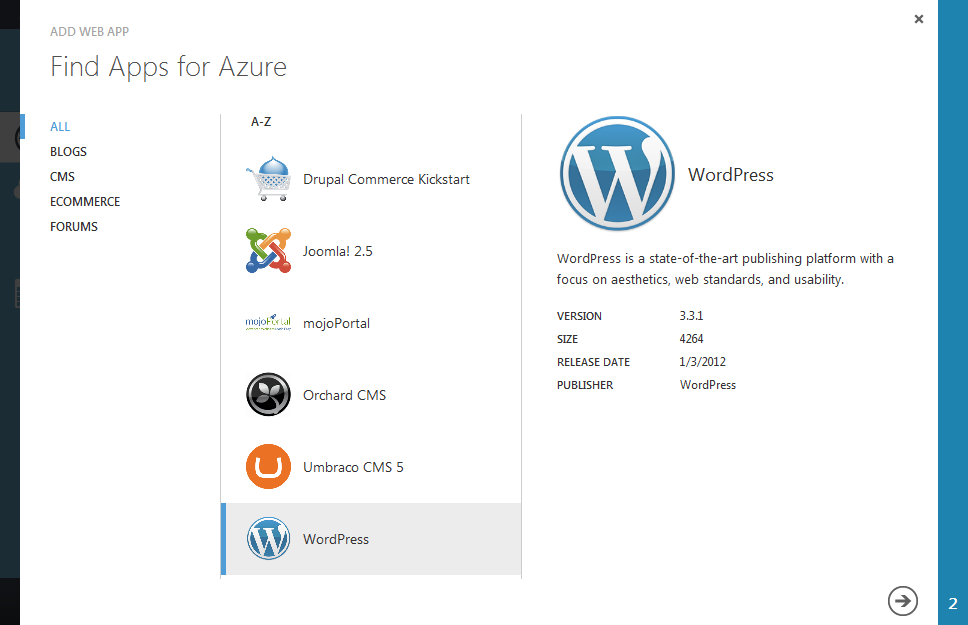
Click the “Next” arrow and choose your website’s URL; leave the database setting as “Create a new MySQL database”; and choose the region closest to you (or your audience).
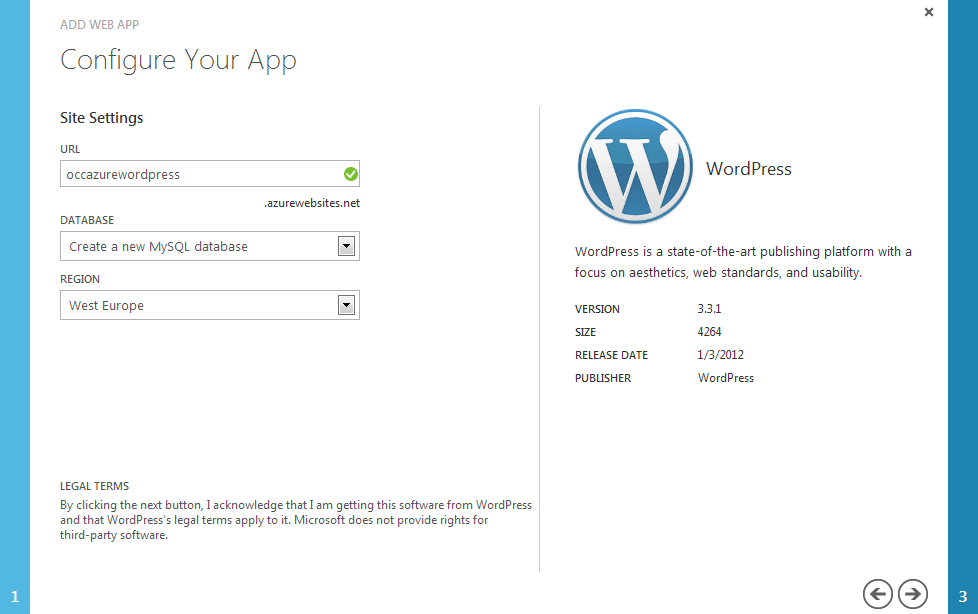
Click the “Next” arrow again and confirm your new MySQL database settings, then click the final “Next” icon to complete the process and Azure will begin deploying your new site.
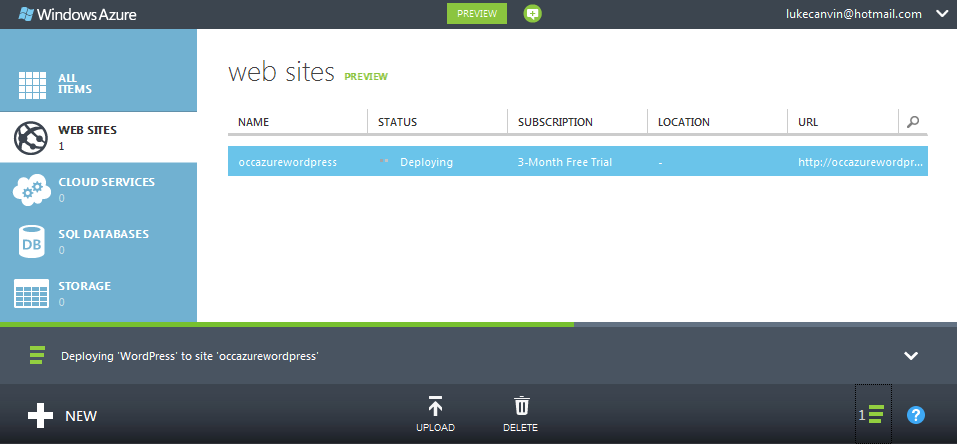
A few moments later and it will inform you that the deployment is complete, and the site is up and running.
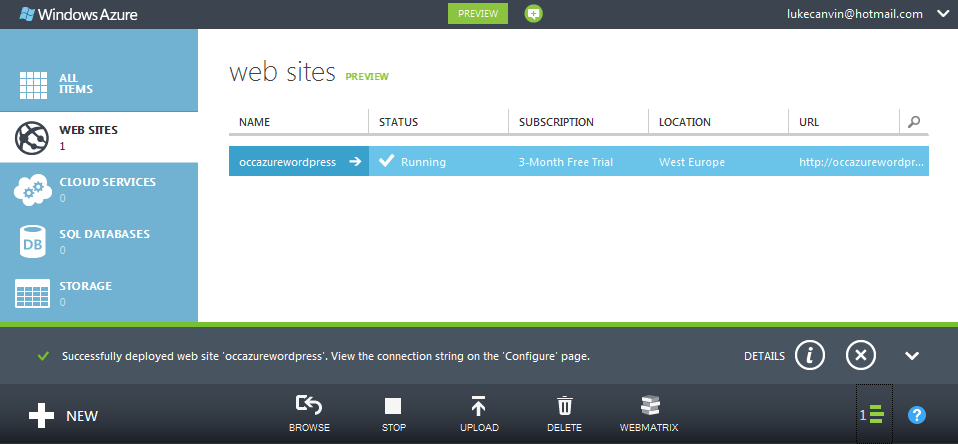
That’s it! Your WordPress site is now live and can be accessed at the URL you configured in the setup earlier; you can get there nice and quickly by clicking the “Browse” icon in the toolbar at the bottom of the Azure portal.
Configure WordPress
As this is WordPress, the first time you access it, it will ask you to complete the installation by making a few configuration choices.
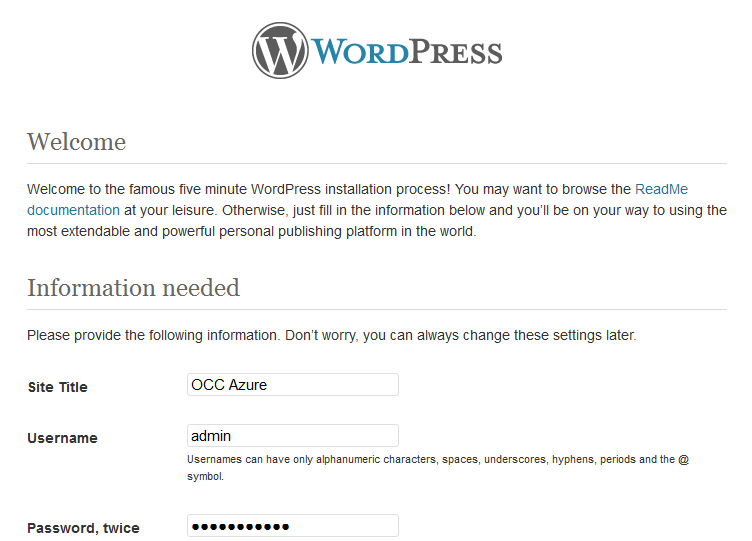
Click the “Install WordPress” button at the bottom to complete the setup and WordPress will show you a “Success!” message with a “Log In” button that will take you to your new WordPress admin login area. Enter your chosen WordPress username and password and log in to see your blog Dashboard.
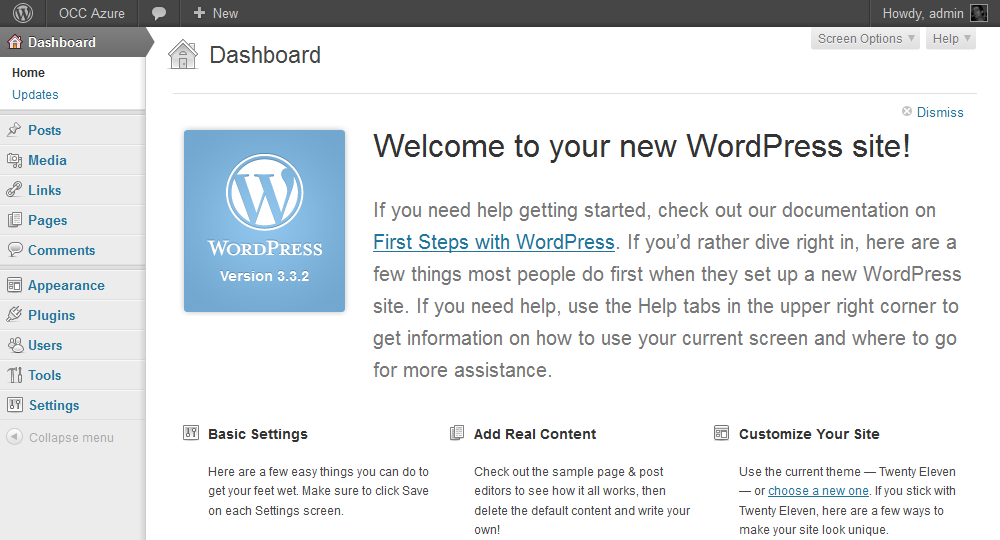
You’ll want to visit the Settings section using the menu bar on the left to tweak any final settings, but you’re all ready to go!
Configure Azure
With any hosted service you’re likely to want to be able to view usage statistics, configure FTP and publishing access, etc. So let’s switch back to Azure.
Set up FTP access
Click on the name of your new site in the Web Sites list and you’ll see a one-off startup page welcoming you and giving you some options for how to proceed.
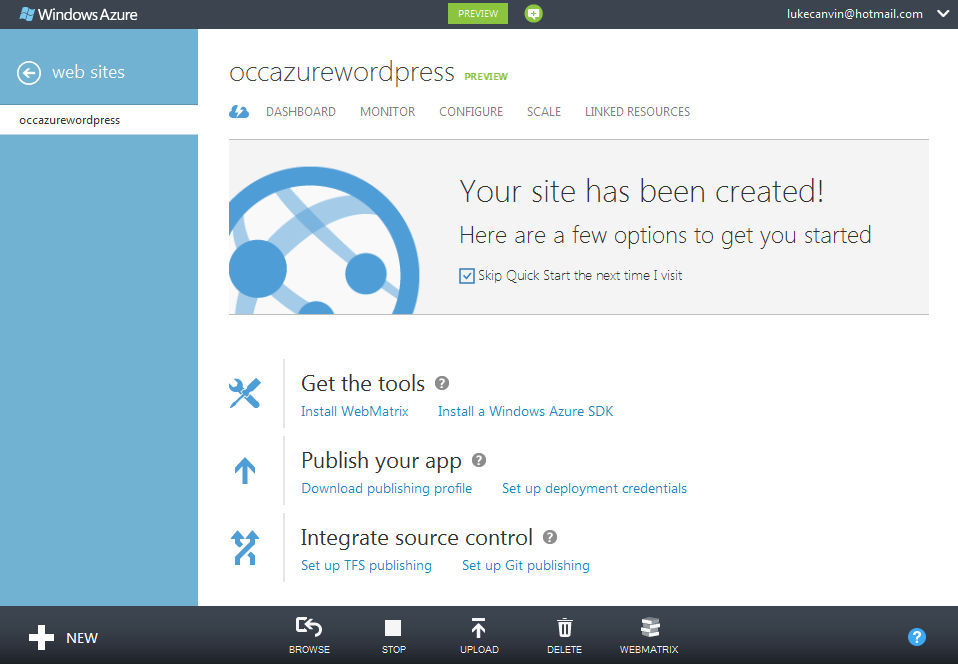
First off, let’s set up FTP access so that you can begin customising WordPress further with custom themes and plugins. Click on “Set up deployment credentials” under the “Publish your app” heading (if you’ve dismissed the welcome screen you can access this through the “Reset deployment credentials” option under the “quick glance” heading on the dashboard).
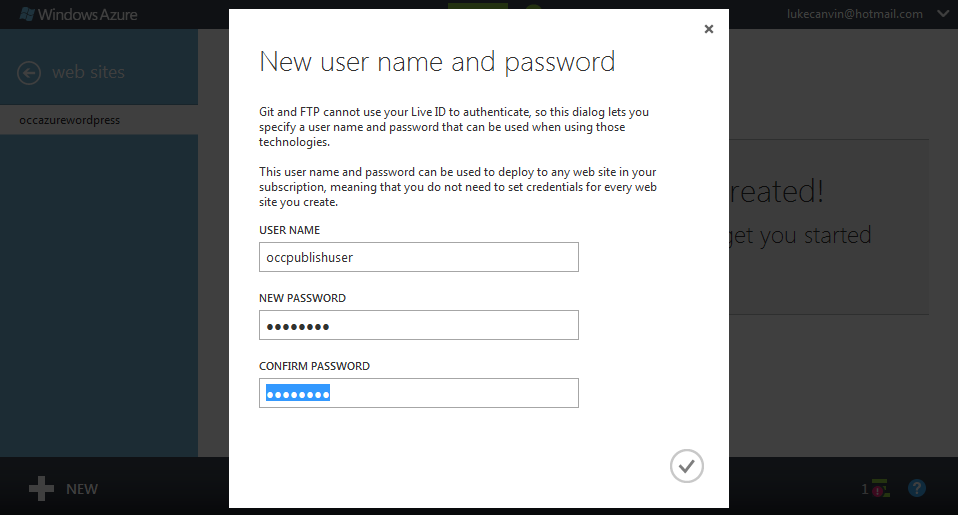
Choose your username and password, click the tick to confirm and you’ll be sent back to the welcome screen with a success message.
Click the “Dashboard” option at the top of the Welcome screen and you’ll see your Azure website dashboard (you can get back to the welcome screen by clicking the cloud with a lightning bolt icon on the left of the dashboard option).
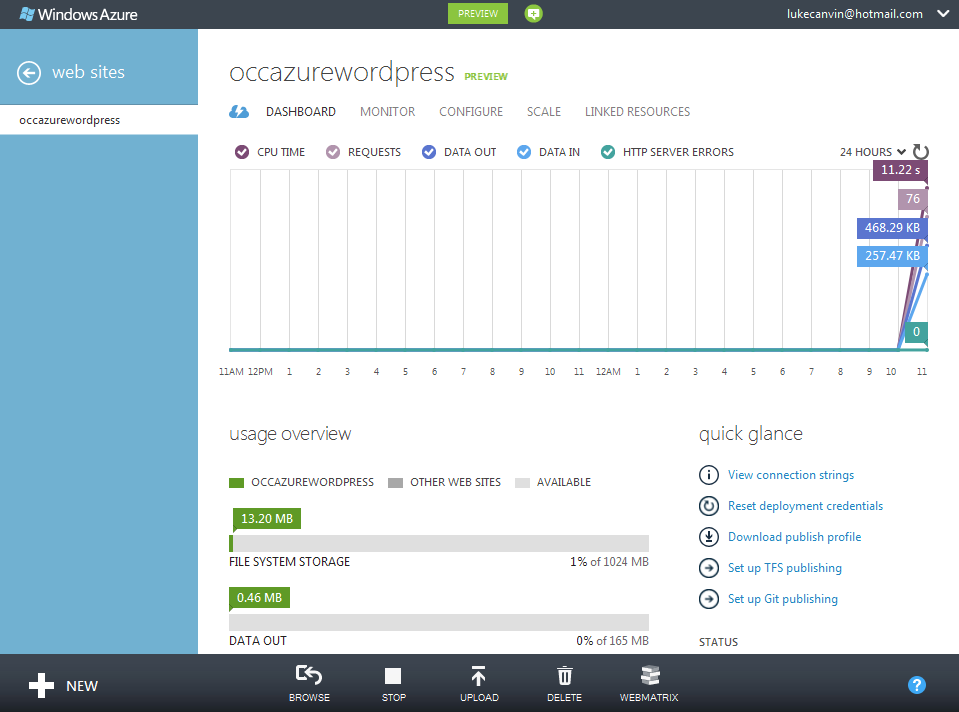
Here you can see a wealth of usage information, as well as plenty of further configuration options. If you scroll down a little, you’ll find your FTP address on the right, under the “FTP hostname” heading. Use this along with the credentials you just set up and you can begin uploading to, and editing your, WordPress installation.
Publishing alternatives
If you use git as your source control you can configure Azure to have its own git repository for your website, which you can push updates to and it’ll build and deploy your changes automatically. Click the “Set up Git publishing” option to be guided through that.
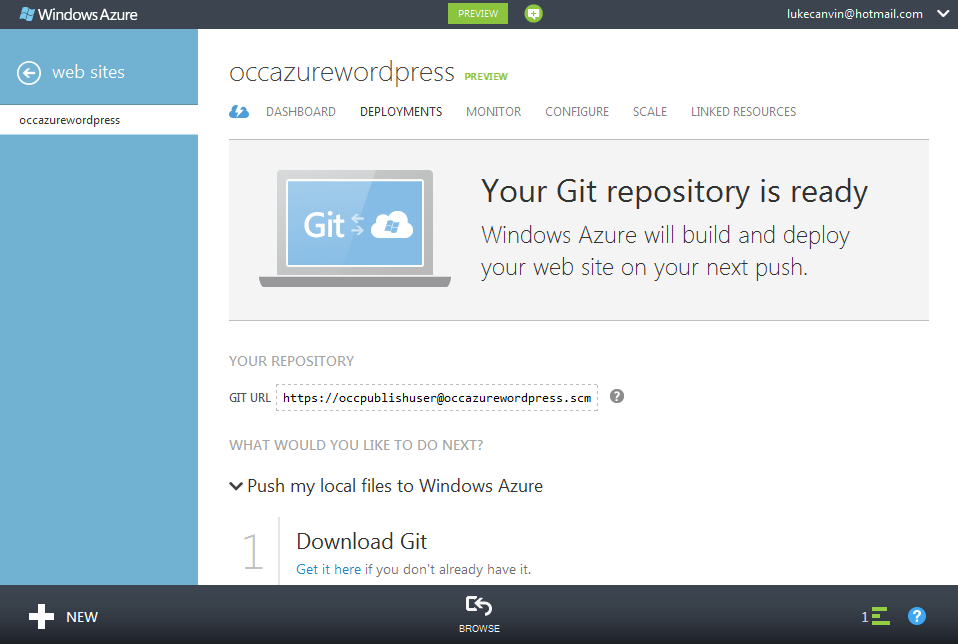
You also have the option of linking your site to TFS (Team Foundation Server) for publishing via that code-base, or you can download a publishing profile to load into Visual Studio to allow direct publishing from there.
To Conclude…
I’m really impressed with Microsoft’s cloud platform; Azure is beautifully designed with lots of thoughtful options and a clear user experience. Hopefully you’ll agree that setting up WordPress is a breeze, and it’s not the only option, Azure also has off-the-shelf installations of Drupal, Joomla and Umbraco in its gallery and I’m sure the list will continue to grow.
In the future I’ll be writing about deploying a custom .Net web application to Azure so keep an eye out for that!